You can create projects and add releases to these projects.
To create projects, follow these steps:
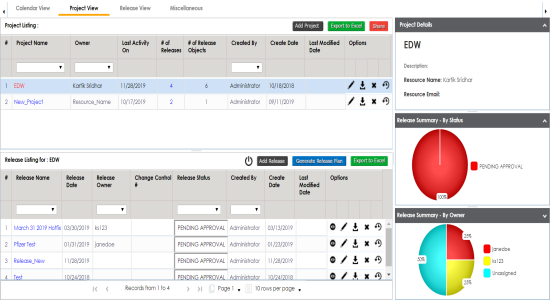
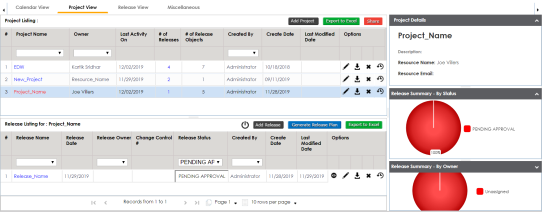
- On the Release Manager page, click the Project View tab.
- Click Add Project.
- Enter appropriate values in the fields. Fields marked with a red asterisk are mandatory. Refer to the following table for field descriptions.
- Click Save.
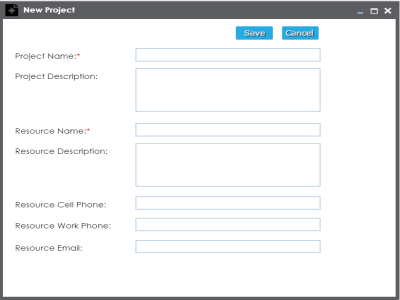
The New Project page appears.
|
Field Name |
Description |
|---|---|
|
Project Name |
Specifies the name of the project. For example, EDW. |
|
Project Description |
Specifies the description about the project. For example: List of releases targeted this spring. |
|
Resource Name |
Specifies the project owner's name. For example, Jane Doe. |
|
Resource Description |
Specifies the description about the project owner. For example: Jane Doe is the release manager of the organization. |
|
Resource Cell Phone |
Specifies the cell phone number of the project owner. For example, +658374414288. |
|
Resource Work Phone |
Specifies the work phone number of the project owner. For example, 1-800-783-7946. |
|
Resource Email |
Specifies the project owner's email address. For example, jane.doe@mauris.edu |
The project is created and saved in the Project Listing.
To add releases to the project, follow these steps:
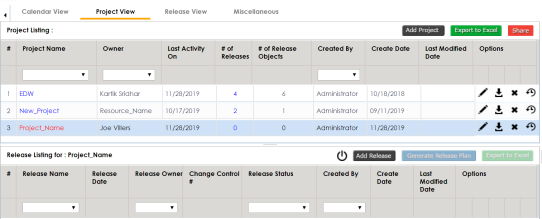
- Under the Project Listing section, select a project.
- Click Add Release.
- Enter appropriate values in the fields. Fields marked with a red asterisk are mandatory. Refer to the following table for field descriptions.
- Click Save.
- Use the following options:
- View (
 )
)- To view the release details, click
.- Edit (
 )
)- To edit, the release, click
. - You can update the release status only by editing a release.
- Download (
 )
)- To download the release details, click
.- Delete (
 )
)- To delete the release, click
. - View (
The Release Listing for the project appears under the Release Listing for: section.
If there are not release associated to a project, the list will be empty.
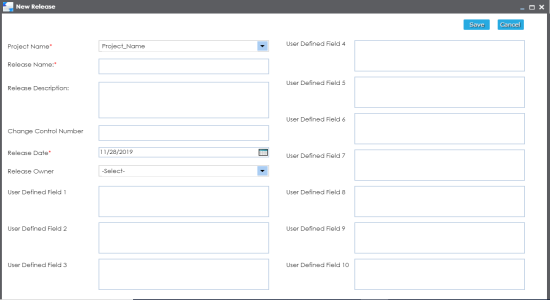
The New Release page appears.
|
Field Name |
Description |
|---|---|
|
Project Name |
Specifies the project name for a release. For example, EDW. |
|
Release Name |
Specifies the name of the release. For example, Pfizer Test. |
|
Release Description |
Specifies the description about the release. For example: The release contains two release objects of the data item type. |
|
Change Control Number |
Specifies the change control number of the release. For example, v1.8. |
|
Release Date |
Specifies the date of the release. For example, 01/22/2020. Use |
|
Release Owner |
Specifies the release owner's User ID. For example, jdoe. This list displays the users available in the Resource Manager. For more information on creating users, refer to Creating Users and Assigning Roles. |
|
User Defined Fields (1-10) |
Specifies the UI label name of additional. You can define the UI labels in the Language Settings. |
The release is added to the selected project.
Once a release is created, you can add release objects to it.
|
Copyright © 2025 Quest Software Inc. |